¶ Using the Kopia Web Interface
In this guide, you will learn how to use the Kopia Web Interface to create, restore, and manage backups. The web interface is particularly user-friendly.
¶ Step 1: Start the Kopia Web Interface
-
Install Kopia:
Ensure that Kopia is installed on your system. If not, download it from the official website and install it:
Kopia Downloads -
Start the Web Interface:
Start Kopia via the Start Menu by launching KopiaUI.
¶ 
¶ Step 2: Create and Connect a Repository
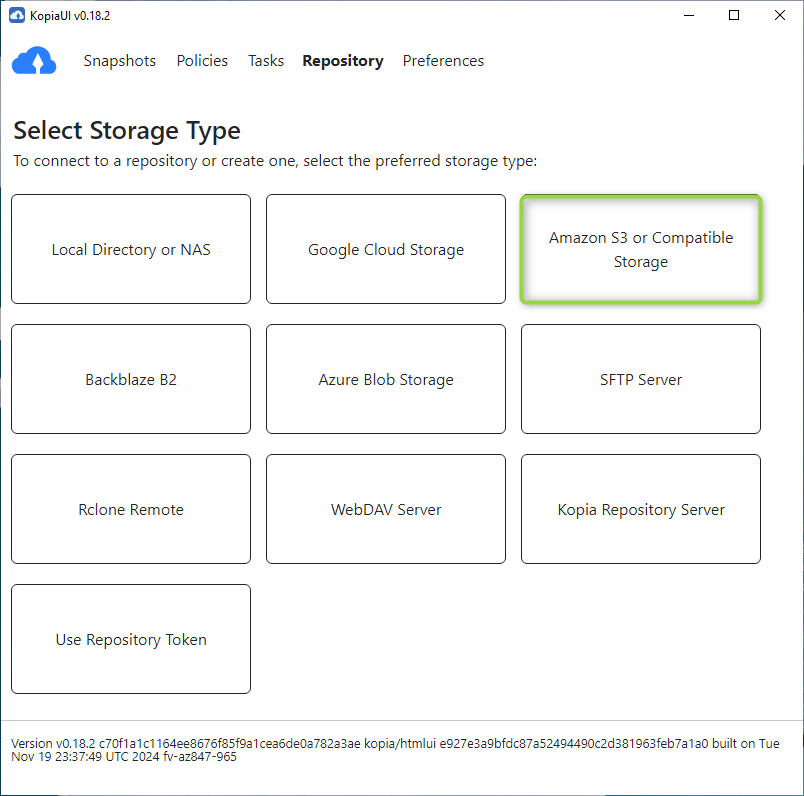
- Create a Repository:
- Click on Repository in the web interface.
- Select Amazon S3 or Compatible Storage as the storage type.
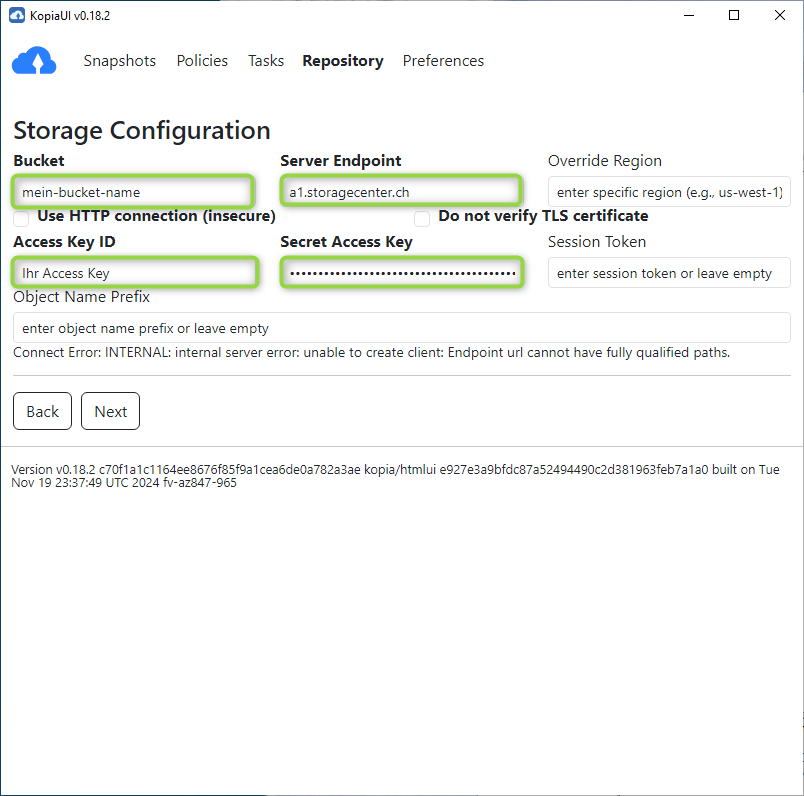
- Enter the following information:
- Bucket Name: The name of your bucket (e.g.,
my-bucket-name). - Access Key ID: Your Access Key.
- Secret Access Key: Your Secret Key.
- Endpoint:
a1.storagecenter.ch.
- Bucket Name: The name of your bucket (e.g.,
- Click on Next.
- Connect to the Repository:
- Create a password for the repository.
This password is used to encrypt the uploaded data. Please store this password securely.
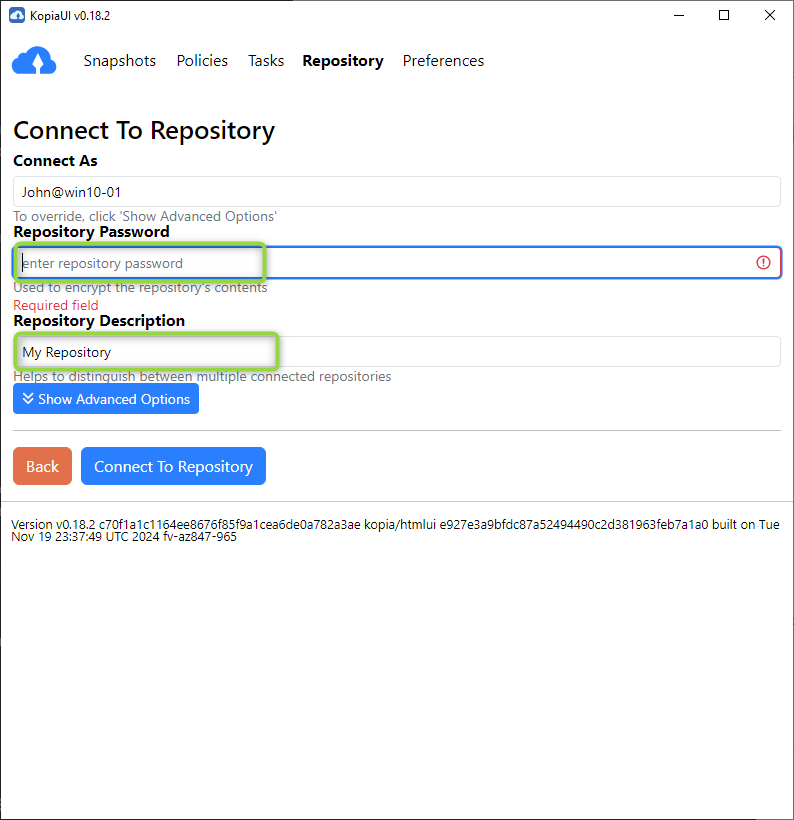
- Click on Connect to Repository.
- Enter the same information as when creating the repository.
- Click on Connect To Repository.
¶ Step 3: Create a Backup
- Create a Backup:
- Click on Snapshots in the web interface, then click on New Snapshot.
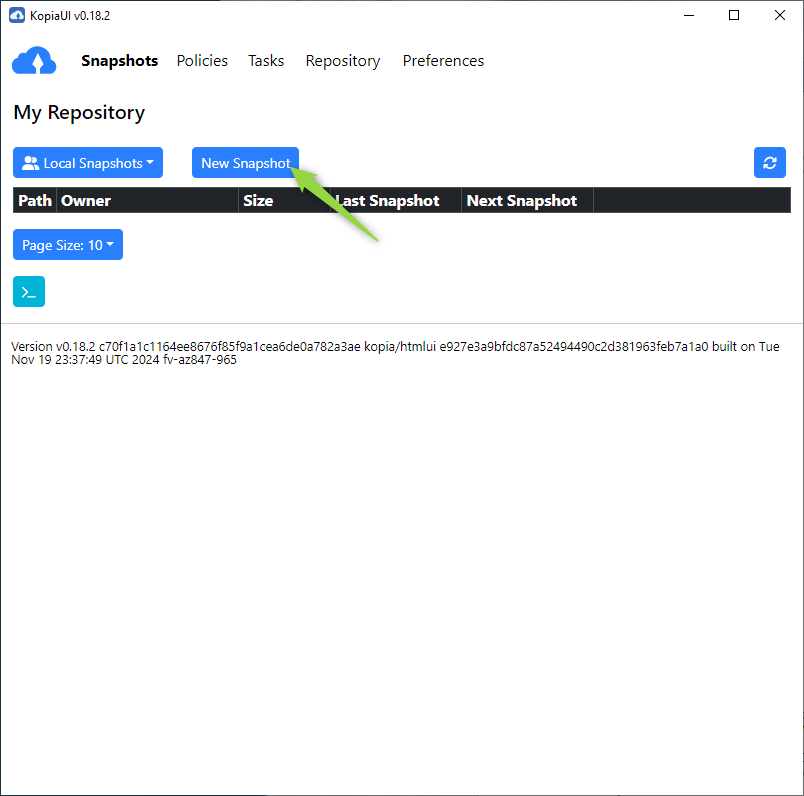
- Select the local directory you want to back up.
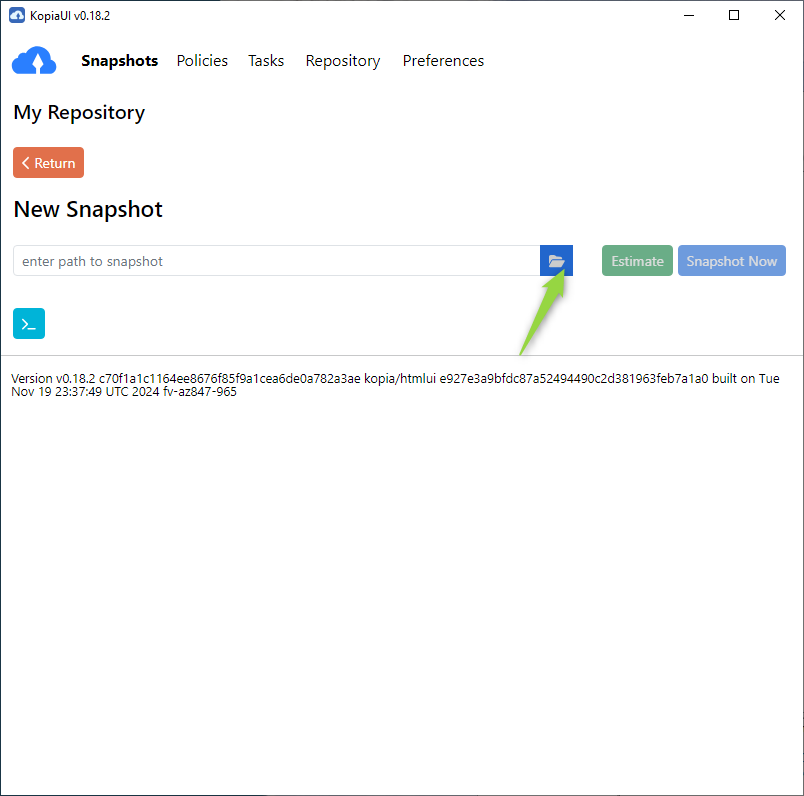
- Click on Snapshot Now.
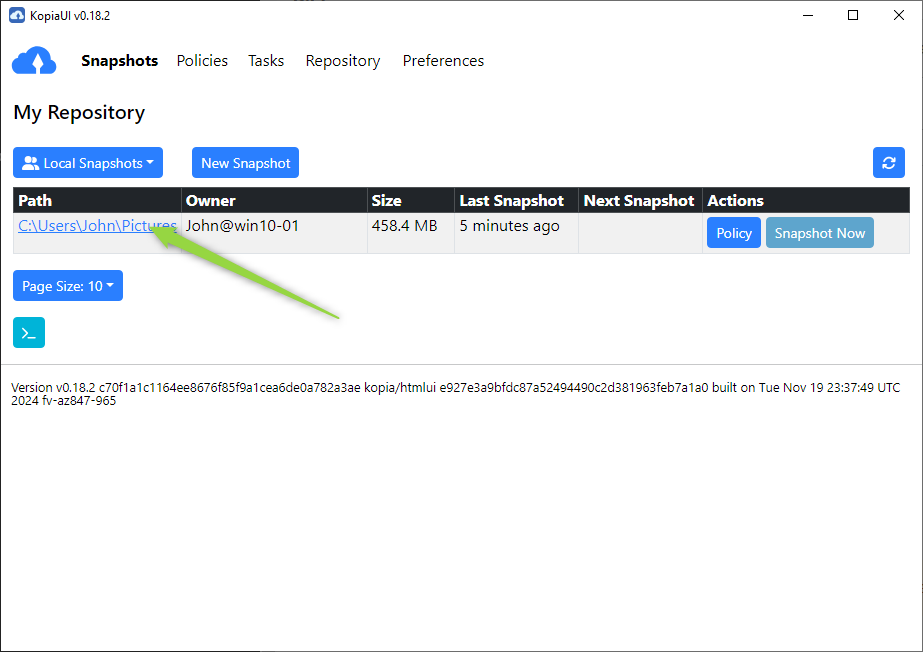
- Check Backup Status:
- Click on Snapshots to view a list of all created backups.
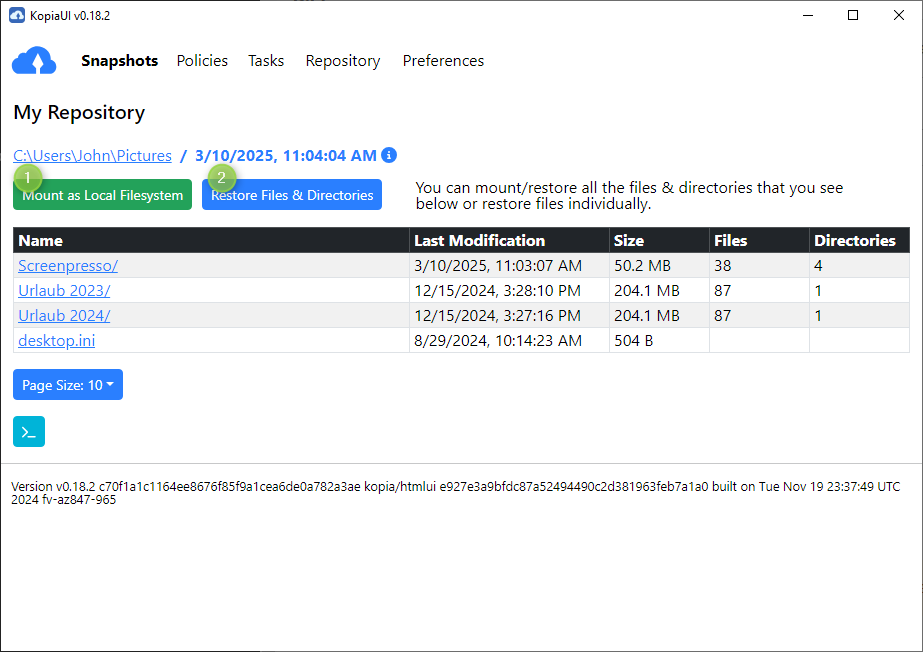
¶ Step 4: Restore a Backup
- Restore a Backup:
-
Click on Snapshots in the web interface.
-
Select the snapshot you want to restore.
-
Click on the path to open the snapshot.
-
- Select the date from which you want to restore the data.

- You have the option to either mount the snapshot to a drive letter.
- Or restore the data directly to a directory.
¶ Step 5: Advanced Features
- Set Backup Policies:
- Click on Policies in the web interface. Here you can manage your policies.
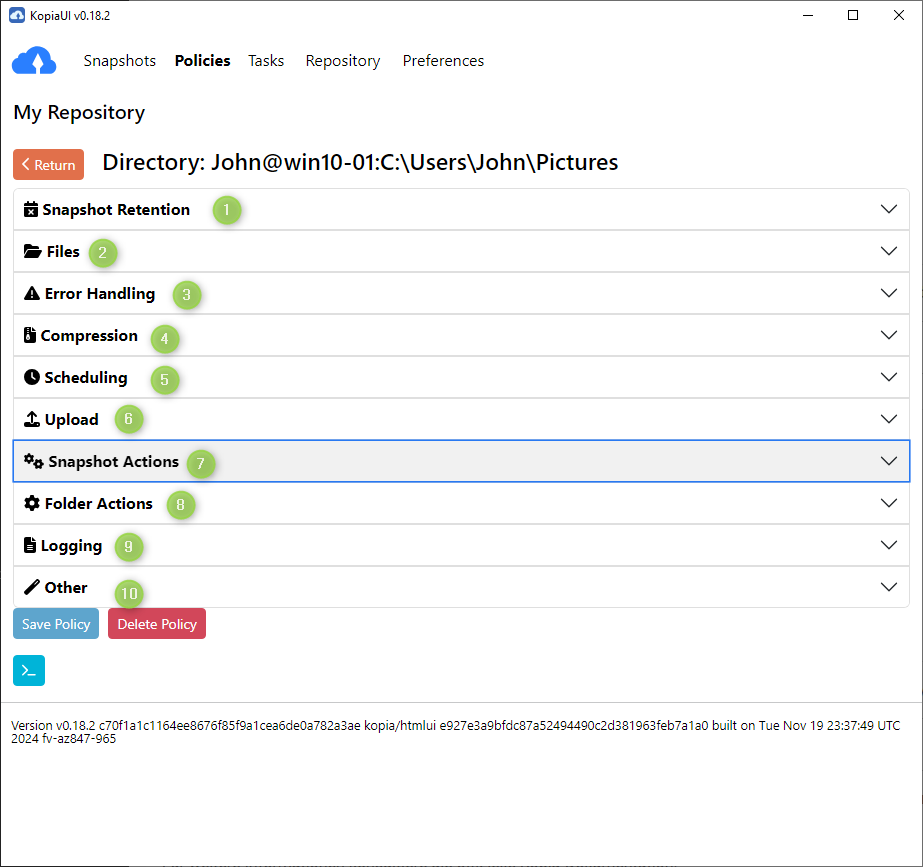
- Retention period for snapshots.
- Which files should be excluded from the backup.
- How Kopia should handle errors.
- Here you can define if and how the data should be compressed.
- Define when a backup should start automatically.
- Under Upload, you can define upload limits.
- Here you can configure additional actions for a snapshot.
- Under Folder Actions, you can define additional actions for specific folders.
- Configure what should be logged and how long the logs should be retained.
- Under Other, you can enter policies in JSON format.
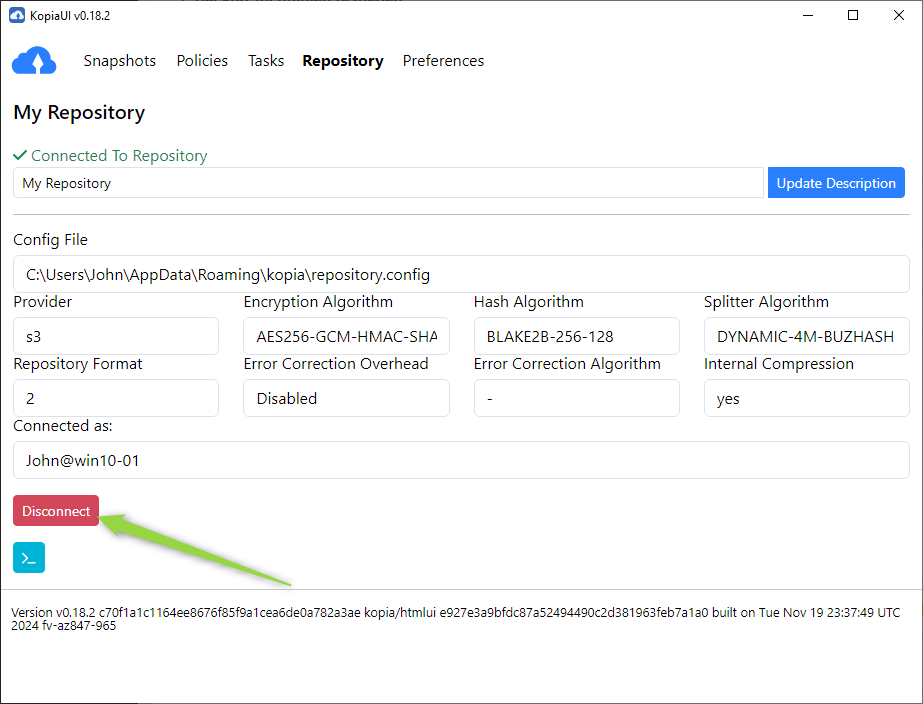
¶ Step 6: Manage the Repository
- Disconnect the Repository:
- Click on Disconnect in the web interface.
Note that to reconnect, you will need to enter the AccessKey, SecretKey, Repository Name, and the password you chose.
- Reconnect the Repository:
- Click on Repository in the web interface.
- Select Amazon S3 or Compatible Storage as the storage type.
- Enter the following information:
- Bucket Name: The name of your bucket (e.g.,
my-bucket-name). - Access Key ID: Your Access Key.
- Secret Access Key: Your Secret Key.
- Endpoint:
a1.storagecenter.ch.
- Bucket Name: The name of your bucket (e.g.,
- Click on Next.
¶ Conclusion
With this guide, you have successfully used the Kopia Web Interface to create, restore, and manage backups. The web interface provides a user-friendly interface without the need for command-line commands.
For more information, consult the official Kopia documentation:
Kopia Documentation